What Should be Paid Attention to in Machine Vision Surface Defect Detection?
Machine vision system for product surface defect detection scheme has always been a difficult point in the vision scheme. This paper describes in detail the design process and key points of machine vision surface defect detection system development.
Key Points of Defect System Design
Most PC-based visual systems can perform detection tasks. When designing a defect detection system, first of all, we need to determine what kind of detection tasks to complete and the specific performance requirements of the task. For example, in the manufacture of electronic products, most of the visual systems are used to find defective parts. Can the camera plus the visual system see the defect? To answer this question, we often need to build a database of bad products and good products, and then build a prototype system using the image database as a sample. The advantage of this method is that the correct software settings can be obtained with few changes to the prototype.
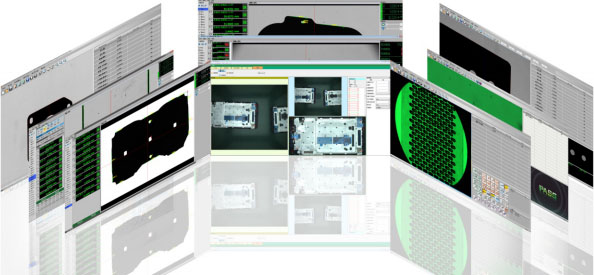
Selection of Lighting System
Lighting is very important in the application of visual inspection because it can ensure that image acquisition is carried out under consistent conditions. Correct illumination should be used to make the parts under test stand in sharp contrast with the surrounding background, and get as many gray levels as possible, so that the visual effect will be obvious. For high-speed moving parts, flash light source can also be used to fix the image instantaneously.
The influence of external natural light
Another purpose of lighting is to reduce reflection. Sometimes the reflection of natural light from the surroundings changes with time, so in the same situation, the light changes much more during the day and at night, which requires the configuration of lighting or the use of light masks to block the surrounding light.
Hardware considerations
Choosing the right camera and lens is the first step to choose the vision system. The basic unit of building an image is called a pixel, and an ordinary image is actually a frame filled with thousands of pixels. Specific application requirements include not only the number of pixels required for each image, but also the type of camera lens.
The influence of camera color
The other one is to decide whether to use color or monochrome. Although color cameras can produce more attractive images, color does not add much valuable information, and generally requires more time to process (monochrome images are usually 8 bits/pixel, while color images require 32 bits/pixel), which is particularly prominent in the application of measuring edge distance. Sometimes, however, color is the only distinguishing factor, and color becomes important, such as when detecting fuses, capacitors or resistors, it may be necessary to search for a particular color. For high resolution color applications, three-piece or RGB cameras can be considered.
The image acquisition hardware
When choosing PC-based visual system, image acquisition hardware is also needed. The features to be considered include driving software and whether the hardware can be well integrated with motion control and data acquisition. For example, motion control can be used to monitor the speed of the conveyor belt, so that image acquisition can be synchronized with the whole process; machine vibration, pressure monitoring and temperature control can also be included in the production system, so as to make maintenance plans in advance. Users can easily integrate conveyor belt control with image acquisition hardware, so as to achieve synchronization between data acquisition hardware, software and motion control, and get a complete solution.
Edge detection
One of the purposes of edge detection is to determine component defects by measuring the distance between two edges. This kind of measurement can be easily automated by PC, and the measurement calculation is faster and faster. This is an important consideration for those who have strict time requirements.
Edge detection can also be used to detect a specific part of the component. It counts the number of edges on the component, and then compares the number with the preset data to complete the search. If the value matches, the part is found on the part. If the value does not match, the part is considered defective.
The definition of edge refers to the area where the gray value of adjacent pixels in an image changes significantly. Edge detection searches the pixel value of a one-dimensional curve along the search area. The one-dimensional search area can be the boundary of a straight line, an arc, an ellipse arc, a rectangle or a polygon, or the edge of a hand-drawn area. The software analyses the pixel value along the line and detects whether there is any obvious intensity change.
Users can specify the critical value of intensity change to determine what constitutes the edge. These parameters include: edge strength, which defines the minimum difference of gray value between background and edge; edge length, which refers to the maximum distance required to produce the required gray difference between edge and background; edge polarity, which determines that the edge is going up. Edge or descending edge; edge position, used to determine the X, Y coordinates of the edge in the image. By changing these values, users can programmatically define various thresholds to find edges in different imaging environments.
Matching Recognition of Product Defect Graphics
The so-called pattern matching is to first have a known pattern (template), and then determine whether the pattern exists on the parts being examined, or to use it as a benchmark as the starting point for other measurements. Traditional graph matching techniques include standard cross correlation, cone matching and proportional constant matching.
Standard cross-correlation is the most commonly used method to find patterns in images. Because its internal principle is based on a series of multiplication operations, the related operation process is time-consuming, but the use of new technologies such as MMX can perform parallel multiplication, which can reduce the total computing time. Users can accelerate the matching process by reducing the image size or limiting the image matching area. However, the basic standards of cross-correlation technology still can not be full.
Product recommendation
TECHNICAL SOLUTION
MORE+You may also be interested in the following information
FREE CONSULTING SERVICE
Let’s help you to find the right solution for your project!





 ASK POMEAS
  PRICE INQUIRY
  REQUEST DEMO/TEST
  FREE TRIAL UNIT
  ACCURATE SELECTION
  ADDRESS
 Tel:+ 86-0769-2266 0867
 Fax:+ 86-0769-2266 0867
 E-mail:marketing@pomeas.com
