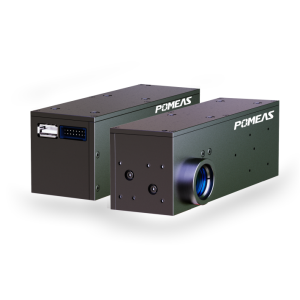
Key Considerations for Selecting Three Major Laser Autofocus Sensors
In the fields of industrial automation, precision measurement, and R&D testing, laser autofocus sensors are widely adopted for their high precision and non-contact operation. However, faced with a vast array of product models, many engineers feel perplexed during selection: How do parameters like “measuring range,” “spot size,” and “response frequency” listed in specifications actually impact real-world performance? And how can I make the optimal choice based on my specific application?


The answer lies in understanding the inherent “triangular trade-off” between these three core parameters and prioritizing them correctly. There is no such thing as an “all-purpose” sensor; the optimal solution is always a balanced choice tailored to a specific application.
I. The “Triangular Constraint” Relationship Among Core Parameters
First, we must establish a core understanding: the three parameters—measuring range, spot size, and response frequency—are mutually constrained, forming an “impossible triangle.” Pursuing extreme performance in one parameter often requires compromises in the others.
- A large measurement range typically implies a longer optical depth of field, which may result in a larger spot size and relatively reduced resolution.
- A small spot size enables high-resolution measurements but demands extremely high installation stability (vibration resistance) and is often accompanied by a smaller measurement range.
- High response frequency demands that sensors process large volumes of data within extremely short timeframes. This may restrict measurement modes and impose greater demands on processing capabilities, sometimes indirectly constrained by spot size and measurement range.
By understanding this underlying logic, we can analyze the significance of each parameter more rationally.
II. In-Depth Analysis of Three Key Parameters


1. Measurement Range: The sensor's “working range”
- What is it?It refers to the maximum distance range (from the closest to the farthest point) within which a sensor can effectively perform measurements. For example, a ±10mm measurement range means the sensor can accurately detect the target object moving within 10mm before or after the reference point.
- How to balance it? Choose larger or smaller?A larger measurement range isn't always better. Under equivalent accuracy conditions, a larger measurement range typically results in relatively reduced linear accuracy (resolution). This is analogous to a 10-meter ruler, where achieving a 1-millimeter minimum scale is impractical.
- Selection recommendation: Your choice should exceed the maximum anticipated fluctuation or displacement of the measured object by 20%-30%, allowing sufficient safety margin to account for installation errors and product variations. However, there is no need to excessively pursue an overly large range.
2. Spot size: The sensor's “measuring tip”
- What is it?Refers to the diameter of the light spot projected by the laser beam onto the surface of the measured object.
- Advantages of a small spot size:High resolution, enabling precise measurement of minute features such as chip pin height, filament diameter, and warpage of thin edges. It is less susceptible to interference from surrounding backgrounds or steep edges.
- Challenges of a small spot size:High sensitivity to installation vibrations. Even minor vibrations can cause the spot to deviate from the target point, resulting in erratic measurement values. It also demands higher surface flatness from the object being measured.
- Large spot advantages: Excellent vibration resistance. The large coverage area minimizes the impact of slight vibrations on the averaged measurement value. Suitable for objects with rough surfaces, pores, or textures (e.g., cast iron parts, felt).
- Large Spot Challenges: Cannot accurately measure small features; tends to average out details like steps and edges, leading to measurement errors.
- Golden Rule for Selection: The spot diameter should be significantly smaller than the feature size you intend to measure. For example, when measuring the height of a 0.5mm-wide component, the spot diameter should ideally be less than 0.2mm.
3. Response frequency: The sensor's “reaction speed”
- What is it?It refers to how many measurements a sensor can perform and output data per second, measured in Hz (Hertz). This determines whether the sensor can keep pace with the movement speed of the object being measured.
- Why must high-speed production lines require high frequency?On high-speed production lines, products move rapidly. If the response frequency is insufficient, the product will have traveled a significant distance between two sensor samples. This leads to sparse sampling points, loss of detail, and even the inability to capture a complete contour.
- Calculation Formula (Simplified): Required Response Frequency ≈ Production Line Speed ÷ Measurement Interval Precision (Example: If the production line speed is 500 mm/s and you want one data point collected per 1 mm, the required frequency is at least 500 / 1 = 500 Hz. In practical applications, it is recommended to select a value at least twice the calculated figure as a safety margin.)
- Selection Recommendations: Response frequency is a mandatory requirement for high-speed dynamic applications and must be prioritized. For static or low-speed measurements, excessively high specifications are unnecessary.
Product recommendation
TECHNICAL SOLUTION
MORE+You may also be interested in the following information
FREE CONSULTING SERVICE
Let’s help you to find the right solution for your project!


 ASK POMEAS
  PRICE INQUIRY
  REQUEST DEMO/TEST
  FREE TRIAL UNIT
  ACCURATE SELECTION
  ADDRESS
 Tel:+ 86-0769-2266 0867
 Fax:+ 86-0769-2266 0867
 E-mail:marketing@pomeas.com
