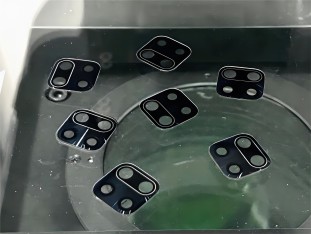
Rapid Measurement of Glass Dimensions Using a Mobile Phone Camera
I. Core Challenges in Measuring Glass Thickness Using Mobile Phone Cameras


1. Transparency and Refraction Effects of Glass: As a transparent medium, light refracts when passing through glass rather than being directly reflected off its surface like opaque objects. This prevents cameras from clearly distinguishing the edges of glass's “front surface” and “back surface” in images, unlike when measuring a wooden block. Directly photographing the edge of glass produces blurred edges with colored glare (due to dispersion), making it difficult to pinpoint precise pixel boundaries.
2. Interference from Ambient Light: Smartphone cameras rely on passive imaging, dependent on ambient illumination. Light intensity, angle, and color significantly impact imaging results, causing edge position drift and resulting in poor measurement repeatability and accuracy. Under sunlight versus shade, the contrast of glass edges differs drastically, with multiple measurements at the same location potentially varying by dozens of pixels.
3. Limitations of the Smartphone Camera Itself
① Resolution and Distortion: Despite high pixel counts, smartphone camera lenses exhibit distortion, particularly at the edges. Measuring glass thickness (typically 0.5mm-2mm) demands extremely high absolute precision, where even minor distortion can cause substantial errors.
② Depth-of-Field Limitations: To clearly capture the glass's side profile, the camera must be positioned very close to the object. However, smartphone cameras have a shallow depth of field at close range, often resulting in unfocused images and blurred edges.
③ Automatic processing interference: Smartphone autofocus, auto-exposure, and auto-white balance algorithms are optimized for photography and constantly adjust, undermining measurement stability and consistency.
4. High-precision calibration challenges: How can the physical dimension represented by a single pixel (pixel equivalent) be calibrated with extreme precision? Standard calibration plates may inherently lack the micrometer-level accuracy required.
II. How to Achieve Lossless, High-Precision Measurement?


To address these challenges, the core approach is to transform passive measurement into active measurement, converting elusive transparent edges into clear, easily distinguishable optical signals. This requires a meticulously designed optical auxiliary measurement solution. The prerequisite for non-destructive measurement is avoiding contact with the glass itself, relying instead on optical detection methods.
III. Core Solution: Spectral Transmissive Thickness Measurement Solution


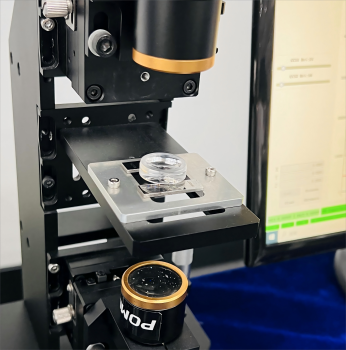
Spectral transmission measurement is a non-contact thickness measurement technology based on optical principles. By analyzing the propagation characteristics of light within transparent or translucent objects—such as refraction, absorption, and interference—and combining spectral analysis with geometric calculations, it achieves high-precision thickness detection down to 0.0001mm.
Product recommendation
TECHNICAL SOLUTION
MORE+You may also be interested in the following information
FREE CONSULTING SERVICE
Let’s help you to find the right solution for your project!


 ASK POMEAS
  PRICE INQUIRY
  REQUEST DEMO/TEST
  FREE TRIAL UNIT
  ACCURATE SELECTION
  ADDRESS
 Tel:+ 86-0769-2266 0867
 Fax:+ 86-0769-2266 0867
 E-mail:marketing@pomeas.com
