How to Accurately Measure Elastic/Flexible Objects? Image Measuring Instrument
In industrial production, measuring the dimensions of elastic/soft objects such as rubber rings, silicone parts, and springs has long posed challenges: Traditional contact measurement tools (like calipers and micrometers) often cause deformation due to clamping force, compromising measurement accuracy; manual visual inspection is inefficient and struggles to ensure data consistency. How can “non-destructive, efficient, and precise” measurement be achieved? Image measuring instruments, leveraging non-contact optical measurement technology, have emerged as the core solution to this challenge.


I. Three Major Challenges in Measuring Elastic/Flexible Objects
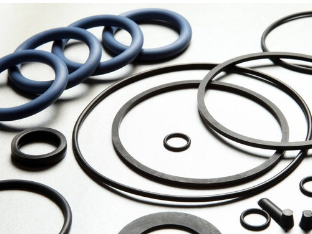
1. The “Deformation Trap” in Contact Measurement: Materials like rubber rings and silicone components are soft. During contact measurement, fixture pressure causes elastic deformation, leading to significant deviations between measured and true values. For example, when a seal manufacturer measured the diameter of a rubber O-ring with calipers, uneven clamping force resulted in measurement errors of up to 0.2mm—far exceeding the product tolerance requirement (±0.05mm).
2. “Measurement Blind Spots” in Complex Structures: Traditional tools struggle to capture all critical dimensions (e.g., pitch, curvature radius) in intricate forms like spring coils or irregular silicone surfaces. Manual inspection relies heavily on experience, making critical defects prone to oversight.
3. Dual bottlenecks of efficiency and consistency: In mass production, manual measurement requires individual processing per part, resulting in low efficiency. Furthermore, variations in measurement techniques among different operators cause data fluctuations, making it difficult to meet quality control requirements.
II. Image Measuring Instruments: A Technological Breakthrough in Non-Contact Measurement


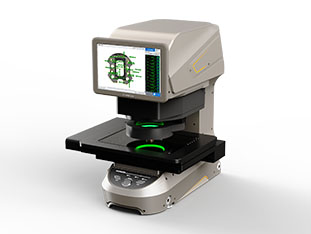
The image measuring instrument achieves “measurement without touching the object” through optical imaging and intelligent algorithms. Its core value lies in:
-
Zero-contact deformation: Eliminates interference from fixture pressure on soft objects, ensuring measurement data accurately reflects the object's original dimensions.
-
Full-scene coverage: Supports measurement of two-dimensional planar dimensions (length, width, angle) and three-dimensional topography (height, curvature, contour), accommodating complex structures.
-
High-efficiency automation: One-click activation of automated measurement reduces individual part inspection time to seconds while ensuring data traceability, meeting the demands of mass production.
III. POMEAS Image Measuring Instrument: Five Key Advantages Designed for Elastic/Flexible Objects


1. High-Precision Optical System: Micrometer-Level Measurement Assurance
-
Dual telecentric lens design: Eliminates lens distortion, ensuring consistent resolution from edge to center of the image, with measurement repeatability accuracy of ±1μm.
-
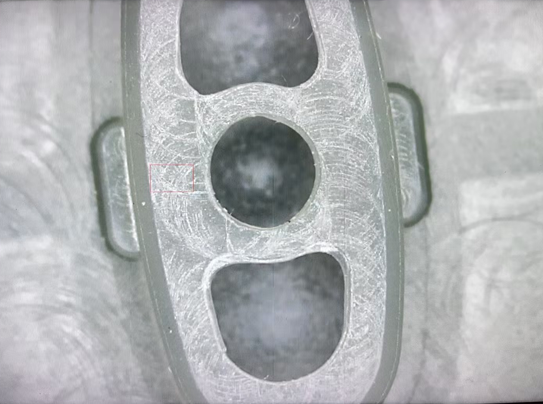
High-Resolution Camera: Equipped with 5-megapixel/12-megapixel industrial cameras to clearly capture minute surface features (e.g., spring wire diameter, scratches on silicone components).
-
Coaxial and Ring Light Combination: Automatically switches light sources based on object material (transparent, reflective, matte) to enhance imaging contrast and prevent missed inspections.
2. Intelligent Algorithms: Complex Structures “One-Click Analysis”
-
Sub-pixel Edge Extraction: Algorithms enhance image edge precision to 0.1-pixel accuracy, enabling precise localization even when object edges are blurred.
-
3D Profile Reconstruction: Combines laser displacement sensors or structured light technology to measure 3D dimensions such as spring pitch and silicone part surface curvature.
-
Automatic Feature Recognition: Built-in measurement templates for standard parts like springs and rubber rings, supporting batch import of CAD drawings with automatic matching of measurement items.
3. Non-contact measurement: Gentle protection for non-destructive testing
-
Zero-pressure measurement: Objects placed on the measurement platform require no fixtures for securing, preventing deformation or contamination caused by contact (such as fingerprint residue on silicone components).
-
Dynamic measurement mode: Supports real-time measurement of vibrating springs. Utilizes stroboscopic illumination or high-speed cameras to freeze motion at critical moments, ensuring data stability.
4. High-Efficiency Automation: The “Quality Engine” of Mass Production
-
One-Click Measurement Process: Fully automated from image capture to data output, with individual measurement time ≤3 seconds—over 10 times more efficient than manual inspection.
-
Multi-Station Collaboration: Integrates seamlessly into production lines, linking with robotic arms and sorting systems to achieve end-to-end automation from measurement to sorting to packaging.
-
Data Traceability and Analysis: Automatically generates measurement reports and supports SPC statistical process control, empowering manufacturers to optimize production processes.
5. Scenario-Based Customization: Adapting to Diverse Needs
-
Modular Design: Select different light sources, lenses, or sensors (such as high-precision laser probes) based on measurement requirements to flexibly handle specialized measurements like rubber ring inner diameters and spring free heights.
-
Industry-Specific Solutions: Provide customized measurement programs for industries including seals, medical consumables, and automotive components to shorten debugging cycles.
The measurement accuracy of elastic/soft objects directly impacts product performance and safety. POMEAS image measuring instruments leverage non-contact optical technology at their core. Through high-precision optical systems, intelligent algorithms, and automated processes, they deliver “non-destructive, efficient, and precise” measurement solutions for industries such as rubber, silicone, and springs.
Product recommendation
TECHNICAL SOLUTION
MORE+You may also be interested in the following information
FREE CONSULTING SERVICE
Let’s help you to find the right solution for your project!


 ASK POMEAS
  PRICE INQUIRY
  REQUEST DEMO/TEST
  FREE TRIAL UNIT
  ACCURATE SELECTION
  ADDRESS
 Tel:+ 86-0769-2266 0867
 Fax:+ 86-0769-2266 0867
 E-mail:marketing@pomeas.com
