Image Dimension Gauge Application Fan Blade True Roundness Inspection
Detection background:


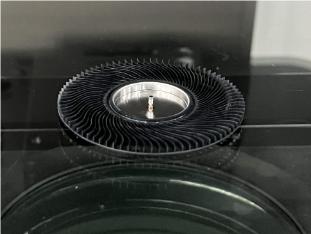
In industrial production, fan blades, as an important part of rotating machinery, have a direct impact on the performance and operational stability of the equipment in terms of roundness (i.e. roundness error). Unqualified fan blade roundness may lead to vibration, noise increase and energy efficiency reduction and other problems. Therefore, the roundness test of fan blade is an important part to ensure its quality.
Testing Requirements:
Detecting the true roundness of fan blades usually requires high accuracy, high efficiency and strong adaptability. Due to the variety of fan blade shapes and materials, the inspection process needs to be able to accurately capture the contour information and make precise calculations. At the same time, in order to improve production efficiency, the inspection process should be as fast and easy as possible.
Inspection Solution: POMEAS Image Dimension Measuring Machine


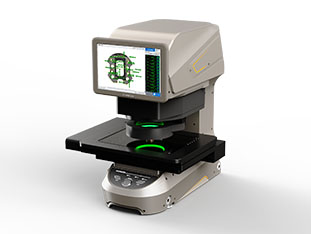
POMEAS Image Dimension Measuring Instrument, as an advanced precision measuring instrument, adopts the new image image measuring technology, which can quickly check the true roundness of fan blades with one click.
Technical Principles:
POMEAS image size measurement instrument through a large field of view, large depth of field, high numerical aperture, low distortion double telecentric lens, the measured fan blade image contour reduced by several times or dozens of times, and then transferred to the 20 megapixel CMOS camera to do the digitization process. The background drawing and measuring software quickly captures the fan blade outline according to the pre-set programming instructions and compares it with the scale formed by the tiny pixel points of the CMOS camera to calculate the size of the fan blade and the evaluation of the true roundness.
Detection Advantage:
-
High Accuracy: POMEAS image size measurement instrument adopts dual telecentric lenses and 20 megapixel camera, combined with 0.005 sub-pixel edge extraction algorithm, to ensure the high accuracy of measurement results.
-
High efficiency: one-button operation, the system measures fast, can measure multiple parts in one second, greatly improving the inspection efficiency.
-
Strong adaptability: automatic lifting multi-angle surface light and surface coaxial light design, can adapt to different shapes and materials of the fan blade, to ensure that the measurement process of light uniformity and clarity.
-
Intelligent processing: independent powerful AI edge calculation algorithm, easy to realize the surface accurate edge search, boundary clutter filter invalid area, improve the accuracy of measurement.
-
Convenient Output: Inspection report and statistical report can be manufactured by one key, no need for data transmission and computer input and other cumbersome processes, and can be directly output in various formats such as EXCEL, which can quickly display good and defective products.
Detection Steps:
1. Preparation stage: Place the fan blade on the carrier table and make sure its position is stable.
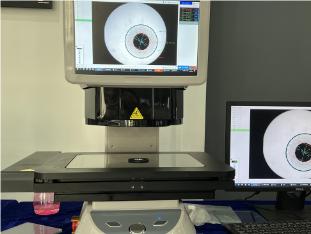
2. Start Measurement: Press the one-key start button on the measuring instrument, and the system starts to capture the contour information of the fan blade automatically.
3. Data processing: The background software digitizes the captured contour information and calculates the size and true roundness of the fan blade.
4. Result output: The measurement results are output in the form of a report, including the size information of the fan blade and the evaluation result of true roundness.
Test results:


Product recommendation
TECHNICAL SOLUTION
MORE+You may also be interested in the following information
FREE CONSULTING SERVICE
Let’s help you to find the right solution for your project!


 ASK POMEAS
  PRICE INQUIRY
  REQUEST DEMO/TEST
  FREE TRIAL UNIT
  ACCURATE SELECTION
  ADDRESS
 Tel:+ 86-0769-2266 0867
 Fax:+ 86-0769-2266 0867
 E-mail:marketing@pomeas.com
