Image Dimension Meter (Flash Meter) Measurement of Clock and Watch Parts Size Application
Measurement background


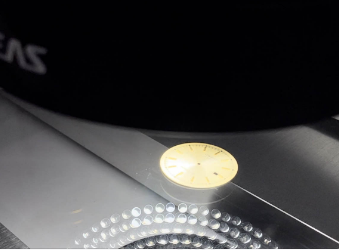
Watch manufacturing, as a perfect combination of precision machinery and art, requires extremely high dimensional accuracy of parts. From tiny gears to fine hands, the dimensional deviation of each part may affect the accuracy and stability of the clock. Therefore, precise measurement technology plays a crucial role in the watch manufacturing process. Traditional manual measurement or simple mechanical measurement methods are no longer able to meet the modern watch manufacturing industry's needs for precision and efficiency, which has prompted the industry to turn to more advanced and efficient measurement technologies.
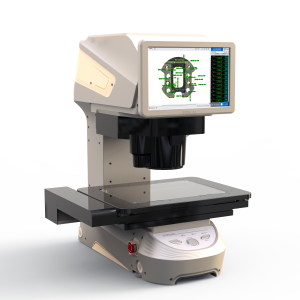
Measurement equipment:POMEAS image dimensioning system IMAGE 3 max


The POMEAS IMAGE 3 max stands out in the field of dimensional measurement of watch parts thanks to its outstanding performance and versatility. This high-precision measuring device not only represents the state-of-the-art in optical measuring technology, but is also ideal for the watch manufacturing industry in their quest for ultimate precision.
The core strength of the IMAGE 3 max lies in its combination of advanced image processing technology and a point-spectrum sensor. This innovative combination allows the instrument to capture high-resolution images over a wide field of view, enabling high-precision measurement of the dimensions of watch parts. Through advanced algorithmic processing, even small dimensional variations can be accurately captured, ensuring reliable and repeatable measurement results.

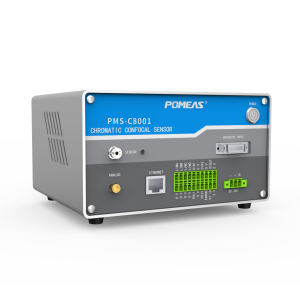
What is particularly noteworthy is that POMEAS IMAGE 3 max is equipped with a point-spectrum sensor, which not only enhances its capability in 2D dimensional measurement, but also realizes the accurate scanning of 3D contours of watch parts. This technological breakthrough enables the IMAGE 3 max to easily cope with the complex and changing surface morphology of watch parts, such as the tooth shape of gears, the curvature of hands, etc., so as to realize the precise measurement of important parameters such as flatness and perpendicularity.
In addition, the high sensitivity of the point spectral sensor allows the IMAGE 3 max to automatically calibrate and compensate for the effects of environmental factors (such as changes in light) on the measurement results during the measurement process, further enhancing the accuracy and stability of the measurement.
With its wide field of view and high resolution image processing capability, combined with the 3D profile scanning technology of the point spectral sensor, the POMEAS IMAGE 3 max meets the urgent needs of the watch manufacturing industry for high-precision and high-efficiency measurements.
Product recommendation
TECHNICAL SOLUTION
MORE+You may also be interested in the following information
FREE CONSULTING SERVICE
Let’s help you to find the right solution for your project!


 ASK POMEAS
  PRICE INQUIRY
  REQUEST DEMO/TEST
  FREE TRIAL UNIT
  ACCURATE SELECTION
  ADDRESS
 Tel:+ 86-0769-2266 0867
 Fax:+ 86-0769-2266 0867
 E-mail:marketing@pomeas.com
