Accuracy Verification of Plug Gauges Measured by In-Line Image Gauge
In-line image measuring instrument, as a high accuracy measuring device, is widely used in precision manufacturing and quality control. In order to verify its measurement accuracy, especially repeatability, we can test it using a standard plug gauge (e.g. 8mm plug gauge). The following are the detailed steps and analyses of how to carry out this verification process.

Preparatory Phase
-
Selection of Standard Plug Gauge: Select an 8mm plug gauge of known accuracy that meets international or national standards as the test tool.
-
Environmental control: Ensure that the measurement environment is stable and that factors such as temperature, humidity and vibration that may affect measurement accuracy are controlled. Ideally, the measurement environment should be close to the recommended conditions in the equipment manual.
-
Equipment Preheating: Preheat the on-line image measuring instrument according to the requirements of the equipment manual to ensure that the equipment reaches the best working condition.
-
Instrument calibration: Use international or national standard calibration tools (e.g. standard ruler, calibration ball, etc.) to calibrate the on-line image measuring instrument to ensure that its measurement reference is accurate.
Testing Phase
-
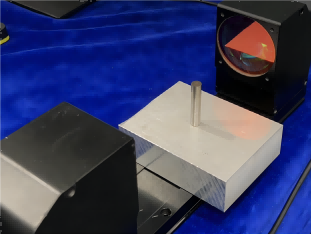
Placement of workpiece: Place the 8mm plug gauge correctly on the working table and fix it stably with the fixture to avoid movement during the measurement.
-
Adjustment of light source: According to the characteristics of the plug gauge, choose the appropriate surface light or transmitted light and adjust the brightness to obtain a clear image.
-
Finding Focus and Capturing: Adjust the camera and lens to make sure the image of the plug gauge is clear and free of distortion, and then capture the image.
-
Repeat Measurement: Take several (e.g. 10) consecutive measurements of the plug gauge and record the results of each measurement. A short time interval should be maintained between each measurement to assess the repeatability of the measurement results.
Data Analysis
-
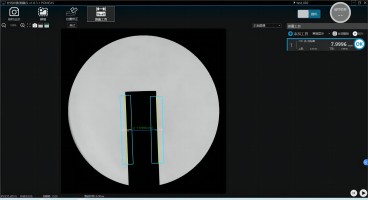
Result Record: Record the result of each measurement and observe the result range. According to the data you provided, the measurement results range from 7.9999 to 8.0001mm, which indicates that the gauge is very accurate.
-
Verify Repeatability: Calculate the standard deviation or extreme deviation of the measurement results to assess repeatability. Since your requirement is to verify the repeatability ±0.1um (i.e. 0.0001mm), and the actual range of measurement results is already smaller than this value, you can assume that the repeatability of the online image measuring instrument meets the requirement.
-
Error analysis: analyse the possible sources of error in the measurement process, such as instrument precision, environmental factors, human operation and so on. For online image measuring instrument, its accuracy is mainly limited by the optical system, image processing algorithm and environmental stability and other factors.


The POMEAS In-Line Image Gauge has demonstrated extremely high accuracy and repeatability when measuring 8mm plug gauges, with results ranging from 7.9999 to 8.0001mm, meeting the repeatability requirement of ±0.1um. This proves the high reliability and accuracy of the gauge for applications in precision manufacturing and quality control.
Product recommendation
TECHNICAL SOLUTION
MORE+You may also be interested in the following information
FREE CONSULTING SERVICE
Let’s help you to find the right solution for your project!


 ASK POMEAS
  PRICE INQUIRY
  REQUEST DEMO/TEST
  FREE TRIAL UNIT
  ACCURATE SELECTION
  ADDRESS
 Tel:+ 86-0769-2266 0867
 Fax:+ 86-0769-2266 0867
 E-mail:marketing@pomeas.com
