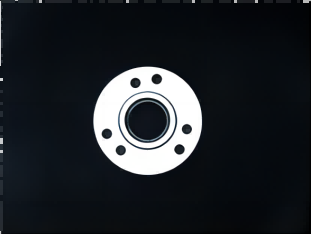
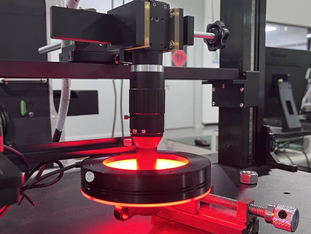
Measuring apertures, especially in modern industrial environments, is crucial to ensure product quality and accuracy. The vision-based aperture measurement solution proposed by POMEAS is an efficient and accurate solution that utilizes advanced technologies such as high-definition industrial cameras, 360° interior lenses, and ring light illumination. The following is a detailed explanation of this solution:


1. High Definition Industrial Camera
- Central role:As the key equipment for image acquisition, HD industrial cameras are responsible for capturing high-definition images of the inside of the measured aperture. Its high resolution and fast response time ensure that the captured image is clear and rich in detail, providing a high-quality data base for subsequent image processing and analysis.
- Specificity:It is usually characterized by low noise, high dynamic range, and stable imaging quality to adapt to a variety of complex industrial environments and lighting conditions.
2. 360° Inside Lens
- Capability:The 360° interior wall lens is the key to achieving full borehole inspection. It is capable of taking a dead center shot around the inner wall of the aperture, ensuring that every detail of the aperture is accurately recorded. This lens design often has a special reflection or refraction mechanism that allows light to travel along the inner wall and return to the camera, creating a complete image of the inner wall.
- Dominance:Compared to traditional single-point or linear scanning methods, the 360° interior lens greatly improves inspection efficiency and accuracy, and reduces the possibility of leakage and misdetection.
3. Ring Lighting
- Capability:Ring source illumination is one of the key factors in ensuring image quality. It provides a uniform, soft light around the aperture under test, eliminating shadows and reflection problems and making features such as textures and defects on the inside of the aperture more visible.
- Specificities:The ring light source design can adjust the brightness and color temperature according to different inspection needs to adapt to the inner wall of the aperture with different materials and colors. In addition, it has the advantages of low energy consumption, long life and easy maintenance.
Implementation steps
Equipment Preparation: Assemble and commission the HD industrial camera, 360° interior lens and ring light illumination system to optimum condition.
Calibration and Positioning: Precisely calibrate the measurement system to ensure that the relative positions of the camera and lens are fixed and accurate. At the same time, the positioning is adjusted according to the specific position and size of the measured aperture.
Image Acquisition: Start the system and collect high-definition images of the inner wall of the aperture through the 360° inner wall lens and ring light source illumination.
Image processing and analysis: Process and analyze the acquired images with professional image processing software to extract the size, shape, defects and other key information of the aperture.
Output of results: Processing results are output in the form of charts, reports, etc. for subsequent quality control and process improvement reference.


The vision technology based bore diameter measurement solution proposed by POMEAS realizes the efficient and accurate measurement of the bore diameter inner wall through the organic combination of HD industrial camera, 360° inner wall lens and ring light source illumination. This solution not only improves the inspection efficiency and accuracy, but also reduces the labor cost and inspection difficulty, which is an indispensable and important tool in modern industrialized production.
Product recommendation
TECHNICAL SOLUTION
MORE+You may also be interested in the following information
FREE CONSULTING SERVICE
Let’s help you to find the right solution for your project!


 ASK POMEAS
  PRICE INQUIRY
  REQUEST DEMO/TEST
  FREE TRIAL UNIT
  ACCURATE SELECTION
  ADDRESS
 Tel:+ 86-0769-2266 0867
 Fax:+ 86-0769-2266 0867
 E-mail:marketing@pomeas.com
