Online Inspection of Sizes and Defects in Drill Bits with Segment Differences
The POMEAS In-Line Image Gauge is a non-contact measuring device utilizing optical and image processing technology. The core advantage is the ability to capture and analyze image data in real time while the workpiece is moving, thus accomplishing a variety of complex dimensional measurement and defect detection tasks.


1. Image Acquisition and Processing: The on-line image measuring instrument captures images of the workpiece through a high-speed camera and transmits them to the image processing system. The system will analyze these images to extract the key feature points of the workpiece, and then calculate the relevant dimensional parameters.
2. Contour Extraction and Comparison: The device automatically extracts the contours of the workpiece edges and compares them with a preset standard contour. Any large differences from the standard contour will be recognized as burrs, defects or foreign objects.
3. Support for Complex Contour Inspection: Whether it is a simple geometry or a complex contour structure, the in-line image measuring device can accurately measure and analyze it to ensure that every detail is monitored.
Advantages of online testing:


1. Improve production efficiency: traditional inspection methods often require downtime, while the on-line image measuring instrument can complete the inspection without stopping the production line, greatly improving production efficiency.
2. Reduce human error: automated inspection reduces the possibility of human intervention, to avoid the measurement errors caused by improper human operation, and improve the accuracy of the test results.
3. Real-time monitoring and feedback: online image measuring instrument can monitor the situation on the production line in real time, and once abnormalities are found, an alarm can be issued immediately to notify the staff to take appropriate measures.
Measurement results:


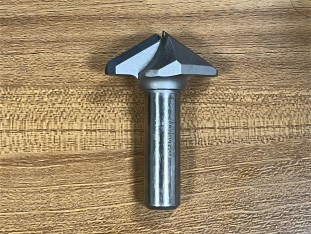
Measuring Size and Defects on Segmented Drill Bits Segmented drill bits are difficult to detect comprehensive dimensions and defects with conventional inspection methods due to their special structure.
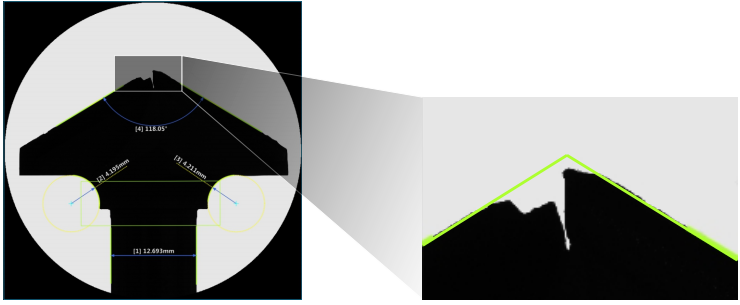
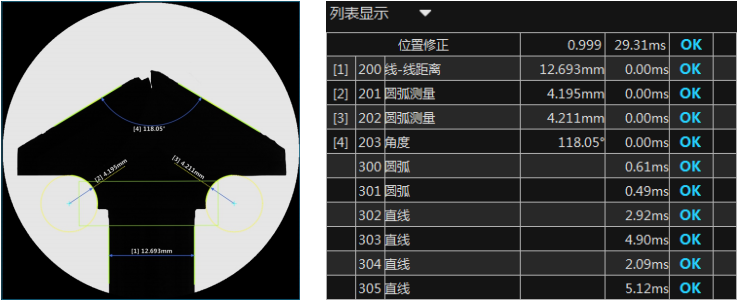
This challenge is easily met by the in-line image measuring system. By analyzing images of each part of the drill bit, the in-line image measuring system can accurately measure key dimensional parameters such as the diameter, length, and segment difference of the drill bit.
The system automatically recognizes burrs, cracks and other defects on the drill bit surface and records the exact location and size for subsequent processing and improvement.
Inspection data is stored and analyzed to help manufacturers find potential quality problems, optimize production processes, and further improve product quality.
With its high efficiency and accuracy, POMEAS in-line image measuring instrument is gradually changing the traditional manufacturing inspection methods. It not only improves production efficiency and reduces costs, but also significantly improves product quality.
Product recommendation
TECHNICAL SOLUTION
MORE+You may also be interested in the following information
FREE CONSULTING SERVICE
Let’s help you to find the right solution for your project!


 ASK POMEAS
  PRICE INQUIRY
  REQUEST DEMO/TEST
  FREE TRIAL UNIT
  ACCURATE SELECTION
  ADDRESS
 Tel:+ 86-0769-2266 0867
 Fax:+ 86-0769-2266 0867
 E-mail:marketing@pomeas.com
