Focus laser autofocus microscopy system for copper foil inspection applications
When inspecting the appearance of copper foil, a magnifying glass or microscope is usually used for observation to ensure the flatness and finish of the surface of the copper foil; while the thickness measurement is carried out using calipers, microscopes, or special instruments such as thickness measuring instruments. This will be very cumbersome and slow down the efficiency of copper foil inspection.


Detecting Difficulties:
The difficulty of copper foil inspection comes mainly from the diversity and minuteness of its surface defects, as well as variations in surface color. In order to accurately assess the quality of copper foil, it is necessary to use a variety of inspection methods and techniques and to carry out refined measurements with the help of high-precision inspection instruments.
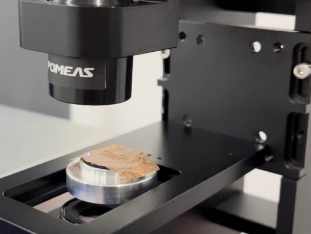
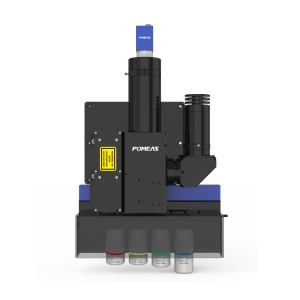
POMEAS Focus laser autofocus microscope system combines semiconductor laser, optical system high-speed signal processing module, laser control, motion control, and software algorithms into a single system with high focus accuracy, fast focus speed, stable and reliable product performance, which can be widely used in complex applications and environments. It can quickly complete copper foil inspection.


Detection Program:
1. Sample Preparation: Firstly, you need to place the copper foil sample to be inspected on the carrier table of the microscope system and make sure its position is stable and flat.
2. System Setting and Adjustment: Start the Focus laser autofocus microscope system and adjust the parameters of the system according to the characteristics of copper foil. This includes choosing the appropriate objective magnification, light source brightness, contrast, etc. to ensure that clear, high-quality microscopic images are obtained.
3. Autofocus and Image Acquisition: Using the Focus laser autofocus function, the system automatically searches for the best focus position on the surface of the copper foil and performs fast and accurate focusing. After focusing is completed, the system can capture the microscopic image of the copper foil and display it on the monitor.
4. Image Processing and Analysis: Through the image processing software, the acquired copper foil image can be further processed and analyzed. This includes steps such as removing noise, enhancing contrast, and extracting features in order to observe the microstructure of copper foil more clearly. At the same time, image analysis algorithms can be used to quantitatively measure and evaluate parameters such as morphology, size, defects, etc. of the copper foil.
5. Result output and report: Finally, the system can output the processed images and measurement results to a computer or printer to generate inspection reports or data tables. These results can be used in the fields of quality control, production process improvement and scientific research of copper foil.
Detecting effects:


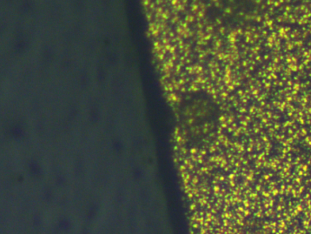
Copper Foil Inspection
Throughout the inspection process, the Focus laser autofocus microscope enables efficient and accurate inspection of the copper foil surface thanks to its high accuracy, fast response and stability. This is of great significance for the quality control of copper foil and the optimization of the production process.
Product recommendation
TECHNICAL SOLUTION
MORE+You may also be interested in the following information
FREE CONSULTING SERVICE
Let’s help you to find the right solution for your project!


 ASK POMEAS
  PRICE INQUIRY
  REQUEST DEMO/TEST
  FREE TRIAL UNIT
  ACCURATE SELECTION
  ADDRESS
 Tel:+ 86-0769-2266 0867
 Fax:+ 86-0769-2266 0867
 E-mail:marketing@pomeas.com
