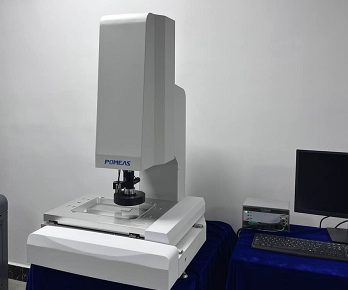
What are some of the items tested by Image Measurement Vision Solutions?
POMEAS Image Measurement Vision Solution is a non-contact measurement solution equipped with self-developed optical modules, spectral sensors and 3DOS measurement software, which can effectively and accurately obtain key information such as geometric dimensions, shape and position of an object.
In addition to common two-dimensional dimensional inspection, image measuring vision solutions are also capable of three-dimensional dimensional inspection such as flatness, contour, segment difference, etc., providing a more comprehensive means of quality control for industrial production.


First, plane size detection
Image measuring vision solutions offer high precision and reliability in flat size inspection. Through high-precision image processing technology, dimensions such as length, width, and diameter of an object can be accurately measured. This information has a significant impact on product consistency. For example, in the production of electronic components, accurate component dimensions are a key factor in ensuring their functionality and stability.
Second, flatness detection
Flatness inspection is an important indicator for assessing the flatness of an object's surface. With an image measurement vision solution, the surface of an object can be compared to an ideal plane and the error in surface flatness can be calculated. This has a significant impact on the smoothness and gloss of product surfaces, such as glass products and sheet metal.
Three, contour detection
Contourness detection is a key metric for assessing the accuracy of an object's contour shape. The image measurement vision program can calculate the deviation by acquiring the contour image of the object surface. It can provide the basis for shape control and correction in the production process, improving productivity and quality.
Segment difference detection
In the production process, the size of the segment difference between neighboring parts directly affects the fit accuracy and stability of the product. Image measurement vision solutions can calculate the positional relationship and height difference between neighboring parts by acquiring images of them. For example, in the manufacture of automotive components, accurate segment gap detection is critical to ensuring vehicle safety and performance.
Image measuring vision solutions offer a wealth of features and many advantages in inspection projects, with comprehensive coverage from 2D to 3D dimensions, providing strong support for quality control in industrial production processes.
Product recommendation
TECHNICAL SOLUTION
MORE+You may also be interested in the following information
FREE CONSULTING SERVICE
Let’s help you to find the right solution for your project!

- APPICATION CASE
- RESOURCE CENTER
- DOWNLOAD CENTER
SOLUTIONS SUPPORT
- ZOOM LENS SELECTION TOOL
- TELECENTRIC LENS SELECTION TOOL
- FA LENS SELECTION TOOL
- ZOOM RATIO TABLE
- CERTIFIED MODEL
SELECTION TOOL
- WHY POMEAS
- FAQ
- PRIVACY POLICY
- TERMS OF USE
- DELIVERY & RETURN POLICY
CUSTOMER CARE
 ADDRESS
Add.:No.68, Chongwei Road, Baizhoubian, East district, Dongguan, China, 523000
CONTACT
 Tel:+ 86-0769-2266 0867
 Fax:+ 86-0769-2266 0867
 E-mail:marketing@pomeas.com

Wechat QR code

 ASK POMEAS
  PRICE INQUIRY
  REQUEST DEMO/TEST
  FREE TRIAL UNIT
  ACCURATE SELECTION