High-precision three-dimensional topographic inspection system for arch-shaped metal parts
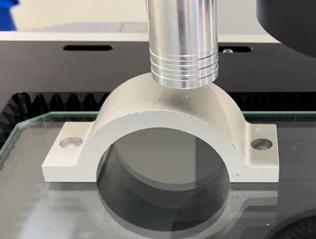
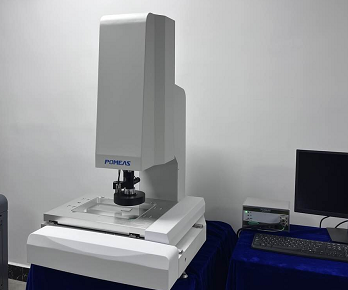
In manufacturing, the complex shape of arched metal parts containing curved surfaces and curved elements makes their inspection a challenging task. Traditional inspection methods often struggle to meet the requirements of high accuracy and comprehensiveness, especially when faced with large spans, lack of characteristic edges and complex site conditions. In order to solve these problems, POMEAS has launched a high-precision 3D shape inspection system - POMEAS 3D Profile Measuring Instrument, which provides a brand new solution for the inspection of arched metal parts.


Difficulty in scanning arched metal parts:
1、Decrease in accuracy due to large spanning diameter: Arch-shaped metal parts often have a large spanning diameter, which not only increases the observation distance, but also makes the point cloud accuracy and density decrease, affecting the accuracy of point cloud splicing and feature extraction.
2、Lack of characteristic edges: Arch-shaped metal parts are composed of multiple surfaces and curves, and lack of characteristic lines such as edges and intersections, which makes it difficult to find corresponding references when splicing the 3D model, and increases the difficulty of point cloud splicing.
3、High precision requirements: the manufacturing precision of the arch-shaped metal parts requires high precision, so its detection also puts forward a higher standard. Need to ensure that the measurement results are accurate and comprehensive to meet the needs of quality control and subsequent processing.
4、The site conditions are complex: in the manufacturing site, there are often space constraints, construction interference and other issues, which further increases the difficulty of arch metal parts detection.
Inspection Solution: High Precision 3D Topography Inspection System


-
High-precision Measurement: Adopting advanced point spectral sensors, it can accurately scan the curved surface of the arched metal parts with XYZ three-axis linkage and get the point cloud value of the surface of the workpiece to ensure the accuracy of the measurement results.
-
Fast scanning: the system is able to complete a large number of measurement tasks in a short period of time, which greatly improves the inspection efficiency. This is critical for manufacturing processes that require fast access to inspection results.
-
Comprehensive Inspection: POMEAS 3D Profile Gauges are capable of scanning the full contour of arched metal parts, including curved surfaces and curved elements, ensuring comprehensive and accurate inspection results.
-
Easy to operate: The system is simple and easy to use, requiring no specialist knowledge or skills to get started.
Test results:


Advantages of high-precision 3D shape inspection system:
Fast measurement of flat dimensions: the system can quickly and accurately measure the flat dimensions of arched metal parts, providing a reliable basis for quality control and subsequent processing.
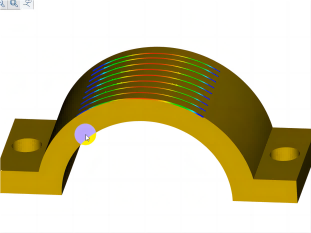
Scanning the contour of arched metal parts: through non-contact scanning measurement, the system can comprehensively and accurately obtain the contour information of arched metal parts, including curved surfaces and curved elements, to ensure the comprehensiveness and accuracy of inspection results.
Product recommendation
TECHNICAL SOLUTION
MORE+You may also be interested in the following information
FREE CONSULTING SERVICE
Let’s help you to find the right solution for your project!


 ASK POMEAS
  PRICE INQUIRY
  REQUEST DEMO/TEST
  FREE TRIAL UNIT
  ACCURATE SELECTION
  ADDRESS
 Tel:+ 86-0769-2266 0867
 Fax:+ 86-0769-2266 0867
 E-mail:marketing@pomeas.com
