Measurement background


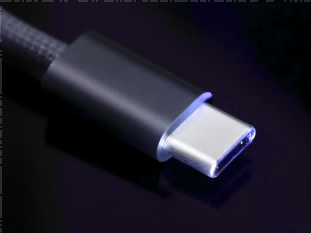
As the Type-C interface is widely used in electronic devices, the dimensional accuracy of the charging head of Type-C data cables is becoming more and more demanding. During the production of the cable, the width of the charging head needs to be precisely controlled to ensure that it fits perfectly into the device interface. If the width of the charging head does not meet the standard, it may lead to problems such as difficult insertion, poor contact and even damage to the device interface. Meanwhile, in the quality inspection process, accurate measurement of the charging head width is also a key step to ensure product quality, which helps to screen out substandard products and improve the overall product reliability.
Measurement Solutions - POMEAS In-Line Image Projection Measuring Instruments
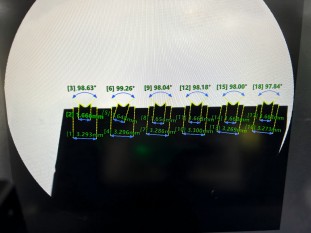
POMEAS in-line image projection measuring instruments utilise the optical projection principle to project the contour of a charging head onto an imaging plane. A clear image of the contour of the charging head is obtained by means of a high-precision optical system and an image sensor. It can measure the dimensions of the charging head on a two-dimensional plane, including width, length, thickness and other various geometric dimensions.


POMEAS in-line image projection measuring instruments feature high precision optics and image sensors that provide high resolution images to ensure the accuracy of charging head width measurements. Measurements can be made to the micron level, for example, within ±5μm of the width of the charging head, which is essential to meet the demands of high-precision production inspection.
Measurement Advantages
1, high precision measurement: online image measuring instrument can achieve micron-level precision measurement. In measurement scenarios such as the width of the charging head of the Type - C data cable, which requires extremely high dimensional accuracy, this high precision can effectively ensure the accuracy of the measurement results. Compared with traditional manual measuring tools (such as calipers, etc.), it can greatly reduce human error and improve the reliability of measurement.
2, non-contact measurement: the use of optical projection for measurement, belonging to the non-contact measurement. This will not cause any damage to the surface of the charging head, especially for some of the surface of the charging head with fine coating or fragile structure is very important. And non-contact measurement can also avoid the contact force caused by the charging head position of small changes, which will affect the stability of the measurement results.
3. efficient in-line measurement: POMEAS in-line image projection measuring instruments can be integrated into the production line to realise real-time in-line measurement of the charging head. During the production process, it can quickly measure the width of each charging head and automatically determine whether the product is qualified according to the preset criteria. Once found unqualified products, can be timely issued an alarm to facilitate the staff to deal with, improve production efficiency and product quality control level.
4, data recording and traceability: the measuring instrument is equipped with a data recording function, you can record the charging head width data of each measurement. These data can be used for quality traceability. By analysing the data, we can understand the size fluctuation during the production process and help optimise the production process. For example, if deviations are found in the average value of the charging head width for a particular batch, problems in the production process can be traced back to wear and tear of the moulds, changes in processing parameters, etc.
Product recommendation
TECHNICAL SOLUTION
MORE+You may also be interested in the following information
FREE CONSULTING SERVICE
Let’s help you to find the right solution for your project!


 ASK POMEAS
  PRICE INQUIRY
  REQUEST DEMO/TEST
  FREE TRIAL UNIT
  ACCURATE SELECTION
  ADDRESS
 Tel:+ 86-0769-2266 0867
 Fax:+ 86-0769-2266 0867
 E-mail:marketing@pomeas.com
