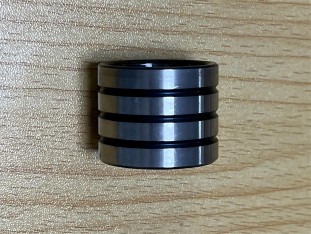
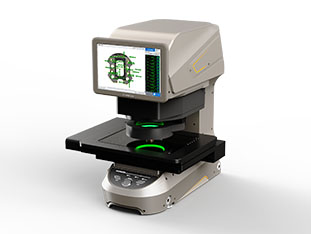
Flash Meter Measures Inside and Outside Diameter and Concentricity of Metal Rings
Measurement Background
As a key component in modern manufacturing, metal rings are widely used in automotive, aerospace, precision machinery and many other fields. Accurate measurement of their inner diameter, outer diameter and concentricity is essential to ensure product quality, improve assembly accuracy and extend service life. The traditional manual measurement method is not only time-consuming and laborious, but also susceptible to the influence of human factors, resulting in large measurement errors, which is difficult to meet the needs of high-precision manufacturing. Therefore, it is important to find a solution that can quickly and accurately measure the dimensional parameters of metal rings.


Measurement Program


In response to this challenge, POMEAS Image Dimensioning Instruments have been developed as the ideal tool to solve the problem of dimensional measurement of metal rings. Combining advanced image processing technology and precise mechanical design, the Image Dimension Gauge is capable of non-contact, rapid measurement of the inner and outer diameters as well as the concentricity of metal rings.
Measuring Principle and Technical Advantages
POMEAS Image Dimension Measuring Instrument (Flash Meter) captures the image of a metal ring with a high-resolution camera, and uses advanced image processing algorithms to process the image, such as edge recognition and contour extraction, to accurately calculate the ring's inner and outer diameters. For concentricity measurement, the system is able to automatically compare the center positions of the inner and outer edges of the ring and calculate the offset between the two to ensure the accuracy of the measurement results.
The core advantage of POMEAS image dimensioning (flash measurement) is its fast measurement capability. Compared to traditional measurement methods, the Image Dimensioner is able to complete a measurement in a few seconds, which greatly improves work efficiency. At the same time, the non-contact measuring method avoids the wear and errors caused by direct contact between the measuring tool and the workpiece, ensuring long-term stability and repeatability of the measurement.
In actual production, POMEAS Image Dimension Measuring Instruments (Flash Measuring Instruments) are used to strictly control the inner and outer diameters as well as the concentricity of metal sealing rings, a key component of engines. By setting the preset measurement program and tolerance range, the measuring instrument can automatically determine whether each sealing ring is qualified or not, and feedback the measurement results to the production line in real time, realizing the immediate rejection of non-conforming products. This not only significantly improves product quality, but also reduces scrap rate and production costs.
Product recommendation
TECHNICAL SOLUTION
MORE+You may also be interested in the following information
FREE CONSULTING SERVICE
Let’s help you to find the right solution for your project!


 ASK POMEAS
  PRICE INQUIRY
  REQUEST DEMO/TEST
  FREE TRIAL UNIT
  ACCURATE SELECTION
  ADDRESS
 Tel:+ 86-0769-2266 0867
 Fax:+ 86-0769-2266 0867
 E-mail:marketing@pomeas.com
