Line Laser Scanning Sensor for Cell Phone Backplane Flatness Inspection
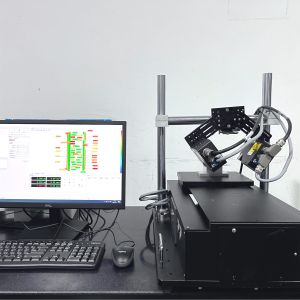
With the rapid development of the smartphone industry, the flatness of the back panel of a cell phone has become one of the most important indicators of its manufacturing quality. The back panel of a cell phone not only needs to have a high degree of flatness to provide a good sense of grip and visual effect, but also to meet the demand for accurate installation of internal components. Therefore, it is particularly important to accurately inspect the flatness of cell phone backplanes during the manufacturing process.
Cell phone backplane scanning faces the following difficulties and requirements:
1. High Accuracy Requirements: Flatness inspection of cell phone backplanes requires micron or even nanometer-level accuracy to ensure detection accuracy.
2. Complex Surface Processing: Some cell phone backplane designs contain complex curved surface elements, which puts higher demands on the flexibility and adaptability of the scanning sensor.
3. Efficient automation: To meet the demands of mass production, the inspection process must be efficiently automated to reduce manual intervention and improve production efficiency.
4. Non-destructive testing: During the inspection process, it is important to ensure that the phone's back panel is not physically damaged in any way to ensure the integrity of the product.

Line laser sensor scanning principle:
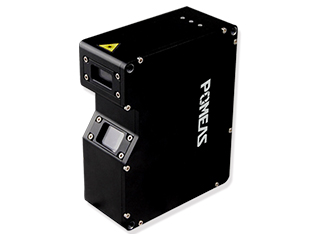
Line laser scanning sensors utilize the straightness and high accuracy of a laser beam to obtain three-dimensional shape information by scanning the surface of the object under test and capturing the reflected light signal. The sensor contains a laser transmitter and multiple receiver elements. The laser transmitter emits a thin, straight laser beam, which forms a spot line on the surface of the object being measured. As the sensor is moved or rotated, the spot line is scanned across the surface of the object and generates a series of spot position information. The receiving element captures these spot position changes and, in conjunction with the geometric relationship of the laser beam and the sensor's trajectory, calculates the 3D coordinates of the surface of the object under test, thereby constructing a 3D shape model of the object.


Characteristics of Line Laser Scanning Sensors for Flatness Inspection of Mobile Phone Backplanes:

1, high-precision measurement: line laser scanning sensor with micron or even nano-scale measurement accuracy, can accurately reflect the small undulations and defects on the surface of the backplane of the cell phone, to meet the demand for high-precision flatness inspection.
2, fast scanning: the sensor can complete the scanning of the entire cell phone backplane in a short period of time, improve the detection efficiency, to meet the requirements of mass production time.
3, non-contact measurement: the use of non-contact measurement, to avoid the traditional contact measurement may cause scratches or damage, to protect the integrity of the phone backplane.
4, flexible to adapt to complex surfaces: line laser scanning sensor has a flexible scanning path and data processing capabilities, can adapt to the detection of complex surfaces in the cell phone backplane, to ensure the comprehensiveness and accuracy of the detection results.
5, automation integration: easy to integrate with automated production lines, automated control of the inspection process, reducing manual intervention and human error, improving production efficiency and inspection stability.
Product recommendation
TECHNICAL SOLUTION
MORE+You may also be interested in the following information
FREE CONSULTING SERVICE
Let’s help you to find the right solution for your project!


 ASK POMEAS
  PRICE INQUIRY
  REQUEST DEMO/TEST
  FREE TRIAL UNIT
  ACCURATE SELECTION
  ADDRESS
 Tel:+ 86-0769-2266 0867
 Fax:+ 86-0769-2266 0867
 E-mail:marketing@pomeas.com
