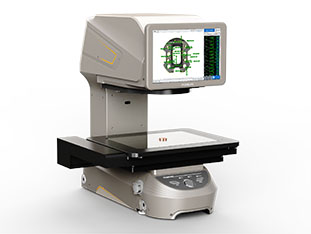
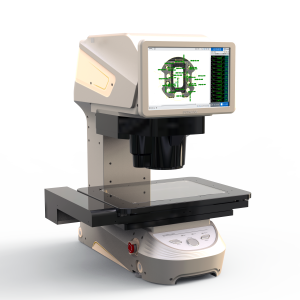
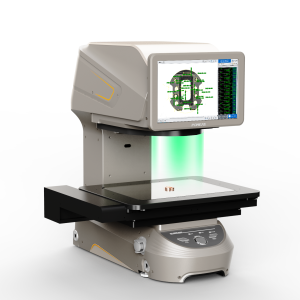
Quick Vision Measurement System is a device that uses image processing technology to automatically inspect the dimensions of the measurement object, and is suitable for a variety of inspection processes such as initial sample inspection, warehousing inspection, in-process sampling inspection, pre-shipment inspection, dimensional measurement on the production line, and high-precision measurement in the laboratory.
The POMEAS IMAGE3 series of quick vision measurement systems are available in standard, moving platform and MAX versions equipped with point spectral sensors for different scenarios, and this article introduces the selection guide for quick vision measurement systems.

1. According to the size of the measurement combined with the product measurement range, select the corresponding equipment
POMEAS quick vision measurement system has a wide range of measurement range, the measurement range of IMAGE3 is φ100mm, the measurement range of IMAGE3 PLUS is 200mmx200mmx75mm, and the measurement range of IMAGE3 pro is 300mmx200mmx75mm, the MAX version of the quick vision measurement system has different modes of high precision and wide field of view, according to the maximum measurement size of the item to be measured, choose the appropriate measurement range, the maximum measurement size is recommended to be less than or equal to 90% of the measurement range of the device.
2. Know the device resolution
The resolution of the measurement equipment can directly affect the imaging quality, usually the higher the resolution, the smaller the size that can be measured, POMEAS quick vision measurement system equipped with optical systems are self-developed double-magnification telecentric optical lenses, low distortion, large depth of field, high-resolution, good imaging quality.
3. Determine the measurement accuracy of the equipment according to the measurement tolerance
The tolerance of the product determines what kind of measurement equipment should be selected, and POMEAS has both high-precision models with a measurement accuracy of ±1 μm and conventional models with a measurement accuracy of ±3 μm to meet different accuracy requirements.
4. Selection according to the measured dimensional parameters
POMEAS standard and mobile platform models of quick vision measurement system can measure curvature, diameter, length and width, distance, radius, circle, hole distance and other flat dimensions. The Max version is equipped with point spectral sensors, in addition to measuring the above flat dimensions, it can also measure height, segment difference and thickness at the same time.
POMEAS quick vision measurement system can solve the problems of traditional measuring instruments and achieve one-button quick measurement, which is widely used in the fields of mobile phones, electronics, plastic parts, hardware, semiconductors, automotive parts and so on.
Product recommendation
TECHNICAL SOLUTION
MORE+You may also be interested in the following information
FREE CONSULTING SERVICE
Let’s help you to find the right solution for your project!


 ASK POMEAS
  PRICE INQUIRY
  REQUEST DEMO/TEST
  FREE TRIAL UNIT
  ACCURATE SELECTION
  ADDRESS
 Tel:+ 86-0769-2266 0867
 Fax:+ 86-0769-2266 0867
 E-mail:marketing@pomeas.com
