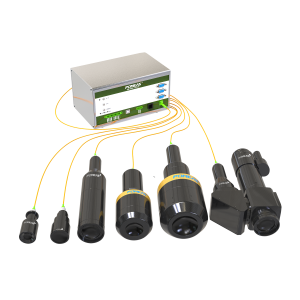
The Pomeas spectral confocal displacement sensor has obvious advantages such as high speed, high precision, and high adaptability to the detection environment and materials. Compared with the traditional contact measurement method, it gradually tends to real-time and non-destructive detection, effectively satisfying the current high-precision measurement. demand. So what exactly can a spectral confocal displacement sensor do?

1. Roughness measurement
Surface roughness is an important measure of surface quality, which is directly related to the working performance of parts, so precise measurement is required. Using spectral confocal displacement sensor, non-contact measurement, without any damage to the product surface, and due to nanometer precision and excellent angular characteristics, the acquisition of roughness profiles can be completed at a higher speed.
2. Surface profile and geometry measurement
With the development of machining level, more and more small and complex workpieces need contour measurement and precise dimension measurement, such as the measurement of small round chamfers, the measurement of the inner wall groove size of small workpieces, etc. Some precision optical components also require non-contact profile measurement to avoid scratching the optical surface during contact measurement. These measurement problems that are difficult to solve with traditional sensors can be solved by building a measurement system with spectral confocal sensors.
3. Thickness measurement of transparent materials such as films
The spectral confocal displacement sensor adopts a coaxial optical path design, which has unique advantages for the thickness of transparent material objects. It can directly measure the thickness through the front and back of the transparent object, and the measurement accuracy can reach the micron level without damaging the measured surface.
The Pomeas spectral confocal displacement sensor does not have the problem that the light is blocked and cannot be measured, which is similar to the point laser triangulation method. It is suitable for the measurement of various workpiece topography features, such as height, level difference, thickness, flatness, and contour. degree, etc.
Product recommendation
TECHNICAL SOLUTION
MORE+You may also be interested in the following information
FREE CONSULTING SERVICE
Let’s help you to find the right solution for your project!




 ASK POMEAS
  PRICE INQUIRY
  REQUEST DEMO/TEST
  FREE TRIAL UNIT
  ACCURATE SELECTION
  ADDRESS
 Tel:+ 86-0769-2266 0867
 Fax:+ 86-0769-2266 0867
 E-mail:marketing@pomeas.com
