Introduction to the Knowledge of Three-Dimensional Visual Measurement System
Two-dimensional vision measurement uses a single camera to measure the position of the target in a specific plane. In two-dimensional vision measurement, because the distance between the camera and the measurement plane is fixed, its application is greatly limited. Three-dimensional vision measurement arises as the times require.
Compared with the two-dimensional image information, the three-dimensional information can reflect the objective object more comprehensively and truly, and provide more information. In recent years, various technologies have been applied to the three-dimensional information measurement, thus forming various three-dimensional measurement systems. After decades of development, three-dimensional vision measurement system has a mature theoretical and technical basis, and production practice has constantly proved that this kind of system is easy to operate, adaptable and accurate.
In a narrow sense, three-dimensional vision measurement technology is to make the computer not only have the same visual perception as human eyes, but also obtain quantified object parameters that human eyes can not directly obtain.
The acquisition of distance information of space three-dimensional objects is the most basic content of three-dimensional imaging, three-dimensional object reconstruction and computer aided design, and has a wide range of practical application value. Optical three-dimensional topography measurement has the characteristics of non-contact, high precision and high efficiency. It has been widely used in scientific research, medical diagnosis, engineering design, criminal investigation field trace analysis, automatic online detection, quality control, robots and many production processes. For this reason, the International Society of Optics (IO) first listed optical three-dimensional measurement as one of the seven main fields and directions of the information optics frontier at its annual meeting in 1994, which focused on the frontier of information optics.

Introduction of three-dimensional topography measurement methods:
Three-dimensional topography measurement methods can be divided into contact and non-contact.
The traditional contact measurement method has been developed for decades, and its mechanical structure and electronic system have been quite mature. Three-coordinate measuring machine and contact roughness profiler are typical representatives of contact three-dimensional measurement. Their principle is to contact the model surface with probe of sampling head, collect data of a contour point, then move a distance horizontally, collect data of adjacent contour points, and finally construct the wire frame model of the whole surface. Contact measurement method has high accuracy and reliability, but it also has the following shortcomings:
(1) When measuring, there is contact pressure between the measuring head and the measured object, which is not suitable for measuring flexible objects, and has no good measurement effect on the surface that the measuring head can not touch. In addition, improper operation can easily damage the surface of the measured object, especially the high-precision surface, and also make the measuring head wear and tear.
(2) The radius of the measuring head itself and the local deformation of the measured object when it is squeezed by the measuring head will affect the accuracy of the measurement.
(3) Contact measurement is a point-by-point scanning method, so the measurement speed is slow, especially when measuring large objects, it is very time-consuming.
(4) Because the mechanical structure of the measuring machine is complex and the working environment is very demanding, it must be earthquake-proof, ash-proof, constant temperature and so on, which limits its application scope.
Although manufacturers all over the world are trying to change this situation with various high and new technologies, they have not fundamentally solved the huge and complex structure caused by the principle of measuring machine itself, which is difficult to meet today's high-efficiency and high-precision measurement needs.
Non-contact measurement methods mainly refer to optical measurement methods.
With the development of Optoelectronics and microelectronics technology, various new devices are emerging, such as Charge Coupled Device (CCD), Digital Light Processing (DLP). Non-contact optical measurement technology has been developed rapidly and has begun to be widely used in some fields. The non-contact optical measurement method is recognized as the most promising three-dimensional surface measurement method because of its high sensitivity, high speed, non-destructive, multi-data acquisition and other advantages.
Classification of optical three-dimensional vision measurement methods
The types of optical three-dimensional vision measurement methods are mainly divided into photogrammetry, time-of-flight, triangulation, projection fringe, imaging plane positioning, interferometry and so on. The basic methods of obtaining three-dimensional information of macroscopic objects can be divided into two categories: passive three-dimensional sensing and active three-dimensional sensing. Passive three-dimensional sensing uses non-structured light (natural light) illumination to obtain distance information from two-dimensional images from one or more camera systems to form three-dimensional surface data. Passive three-dimensional sensing requires a lot of correlation matching operations. When the structure information of the measured object is too simple or complex, or the reflectivity of each point on the measured object is not significantly different, this correlation matching operation will become very complex and difficult.
Active three-dimensional sensing enables structured light illumination, which is due to the spatial or temporal modulation of the three-dimensional surface of the object to the structured light field. The observed deformation square contains the information of the three-dimensional shape of the object. By demodulating the deformation square, the three-dimensional shape data can be obtained. Active three-dimensional sensing has the advantages of non-contact, high automation, high sensitivity and high precision. Therefore, most of the systems aiming at three-dimensional fine surface measurement adopt active three-dimensional sensing.
Classification of three-dimensional sensing methods
According to the different modulation modes of structured illumination light field on three-dimensional surface of objects, people divide active three-dimensional sensing methods into time modulation and space modulation. The most commonly used method is spatial modulation. According to the different measurement principles, spatial modulation can be divided into two categories: direct triangulation method and phase measurement method. Direct triangulation **** profile measurement is based on pure triangulation principle. The height of each point of an object is determined by the geometric imaging relationship among the projection point, the projection point and the imaging point.
Direct triangulation
The advantages of direct triangulation method are simple and reliable signal processing, the absolute height information of each measuring point can be determined only without complex fringe analysis, and the concave and convex objects can be distinguished automatically, even if the physical breakpoints (steps, cracks) and shadows on the object make the pattern discontinuous, the measurement will not be affected; the disadvantage is that the accuracy is not high. High, can not achieve full-field measurement. In recent years, the rising phase measurement method is the triangular light path measurement method illuminated by surface structure light. This method first projects the regular grating fringe image onto the surface of the object to be measured. From another point of view, the fringes which are deformed due to the influence of the height of the object can be observed. This distortion can be interpreted as a space carrier signal whose phase and amplitude are both modulated. The deformed fringes are collected and the required phase information is extracted from the modulated structured light field. Then the three-dimensional shape information of the measured object is calculated according to the mapping relationship between height and phase.
Phase measurement method
Phase measurement method uses surface structured light for projection. It can obtain three-dimensional information of the surface without scanning the object. It has the characteristics of full-field measurement and high-speed measurement. However, since the inverse trigonometric function is used to calculate the phase, the truncation of the phase is within the principal value of the trigonometric function, so the phase unwrapping is necessary to obtain the true phase distribution of the measured object.
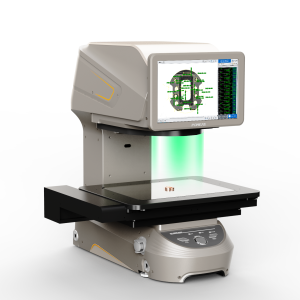
The relevant knowledge of three-dimensional measurement is introduced here. I hope it will be helpful to you. For precise visual measurement, please pay attention to POMEAS AI Intelligent One-button Measuring Instrument.
Product recommendation
TECHNICAL SOLUTION
MORE+You may also be interested in the following information
FREE CONSULTING SERVICE
Let’s help you to find the right solution for your project!




 ASK POMEAS
  PRICE INQUIRY
  REQUEST DEMO/TEST
  FREE TRIAL UNIT
  ACCURATE SELECTION
  ADDRESS
 Tel:+ 86-0769-2266 0867
 Fax:+ 86-0769-2266 0867
 E-mail:marketing@pomeas.com
